Group Manager Tab
The “Group Manager” tab
Use this tab to add new groups and update existing groups.
Add New Group Button
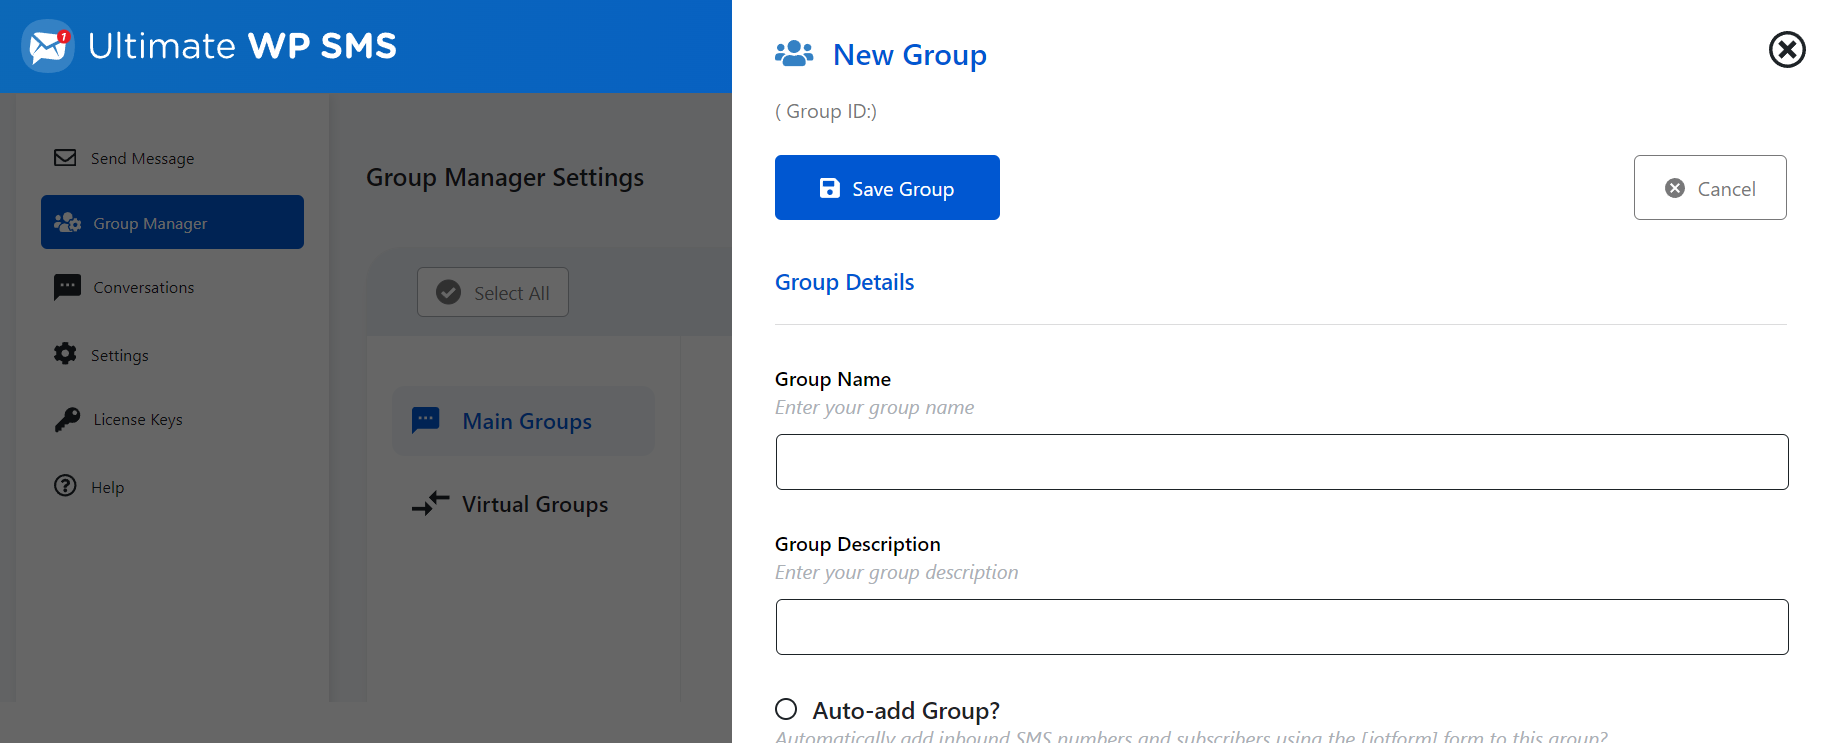
Click on the ![]() button to add a group, giving the group a unique name and a description.
button to add a group, giving the group a unique name and a description.
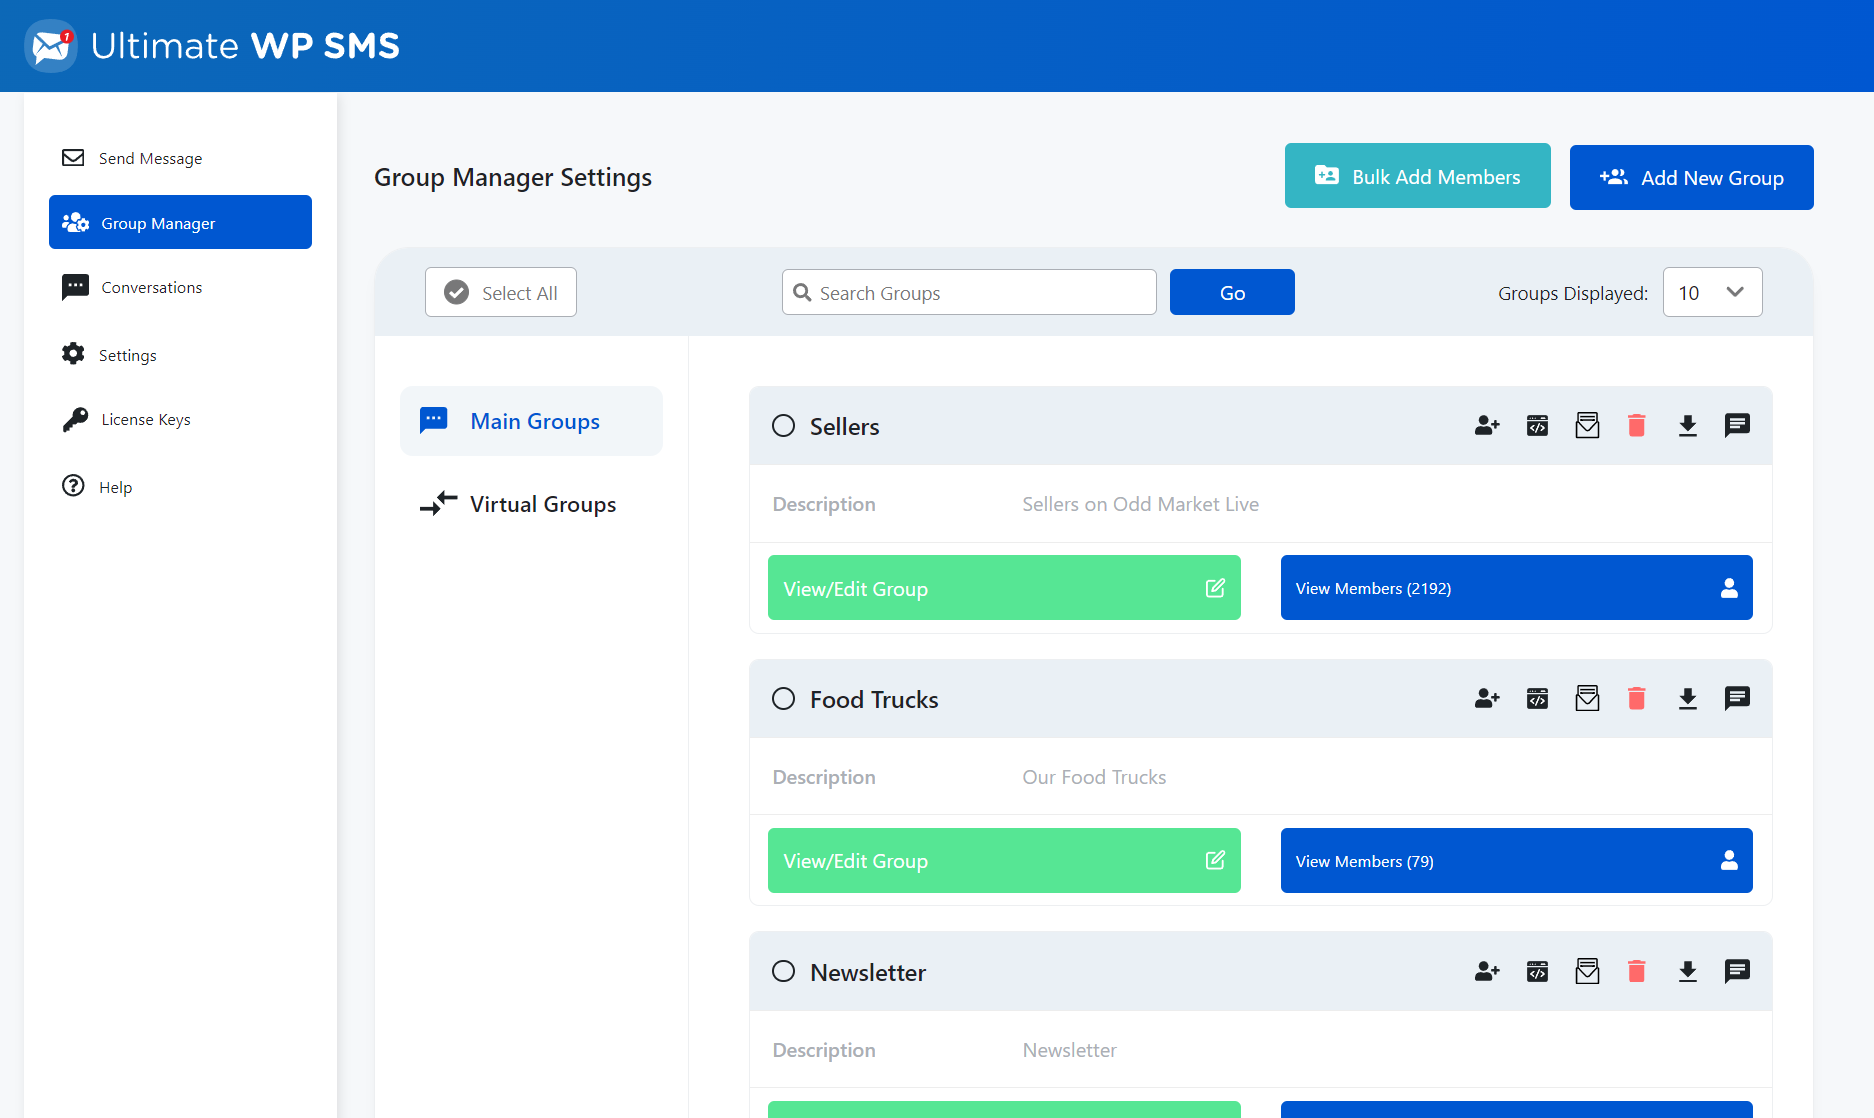
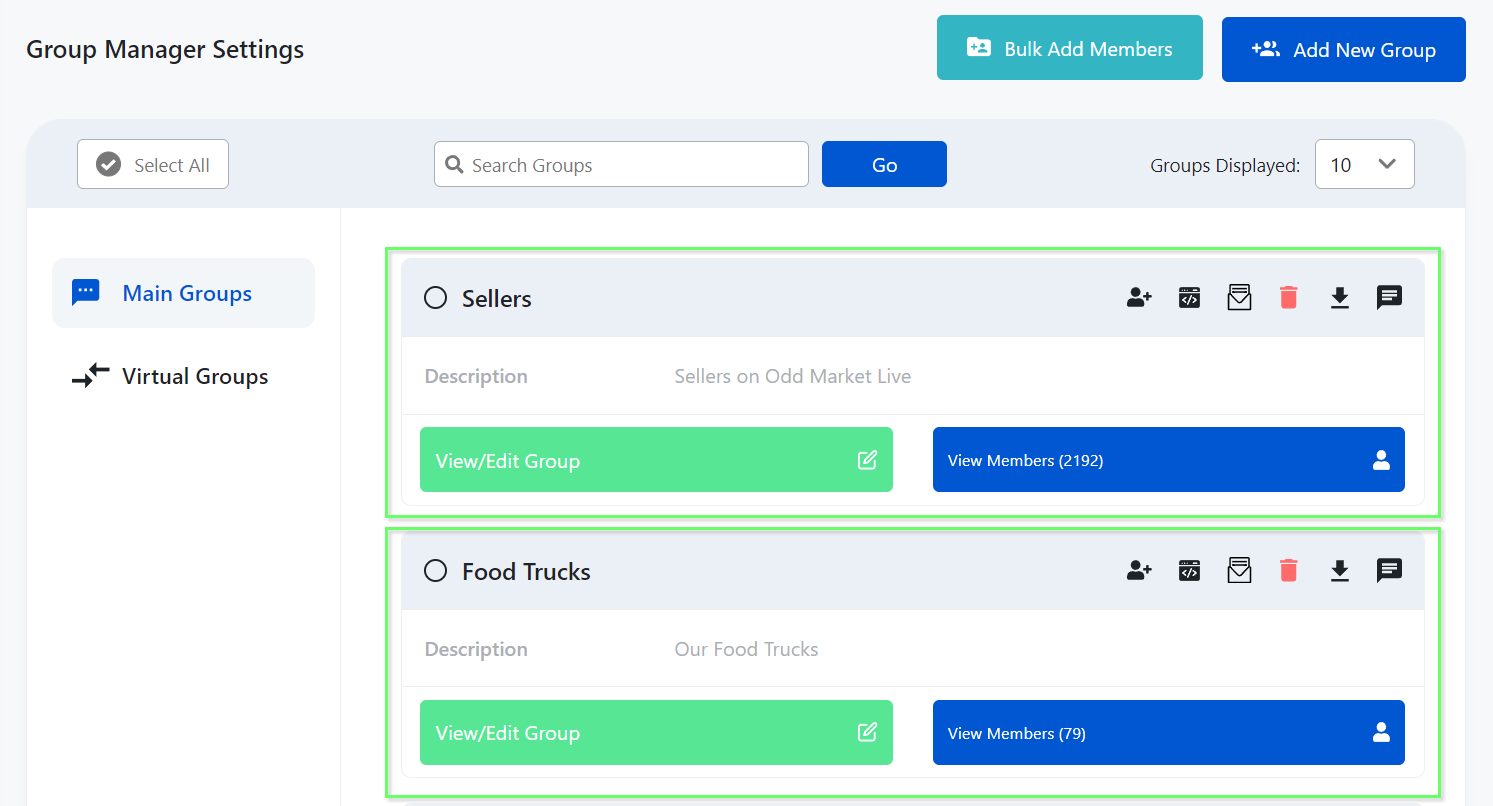
A default group is created for you when the UWS plugin is first installed. This and all other groups you’ve created will be shown in a list like below.
There are a number of group action icons shown next to each group listed:
 – “Add Group Member” button, will open up the member list sidebar and allowing you to add single or multiple new members to the specific group.
 – “Group Shortcode” button, allows you to access a group shortcode form settings.
 – will open up the “Group Invite” sidebar, showing the settings for group member invitation, notifications, and welcome message.
 – deletes the group and all of its members.
 – downloads the members of this group into a CSV file.
 – will open the “send a new message” to create message, selecting only the members of this group. Useful if you have many large groups.
Bulk Add Members Button
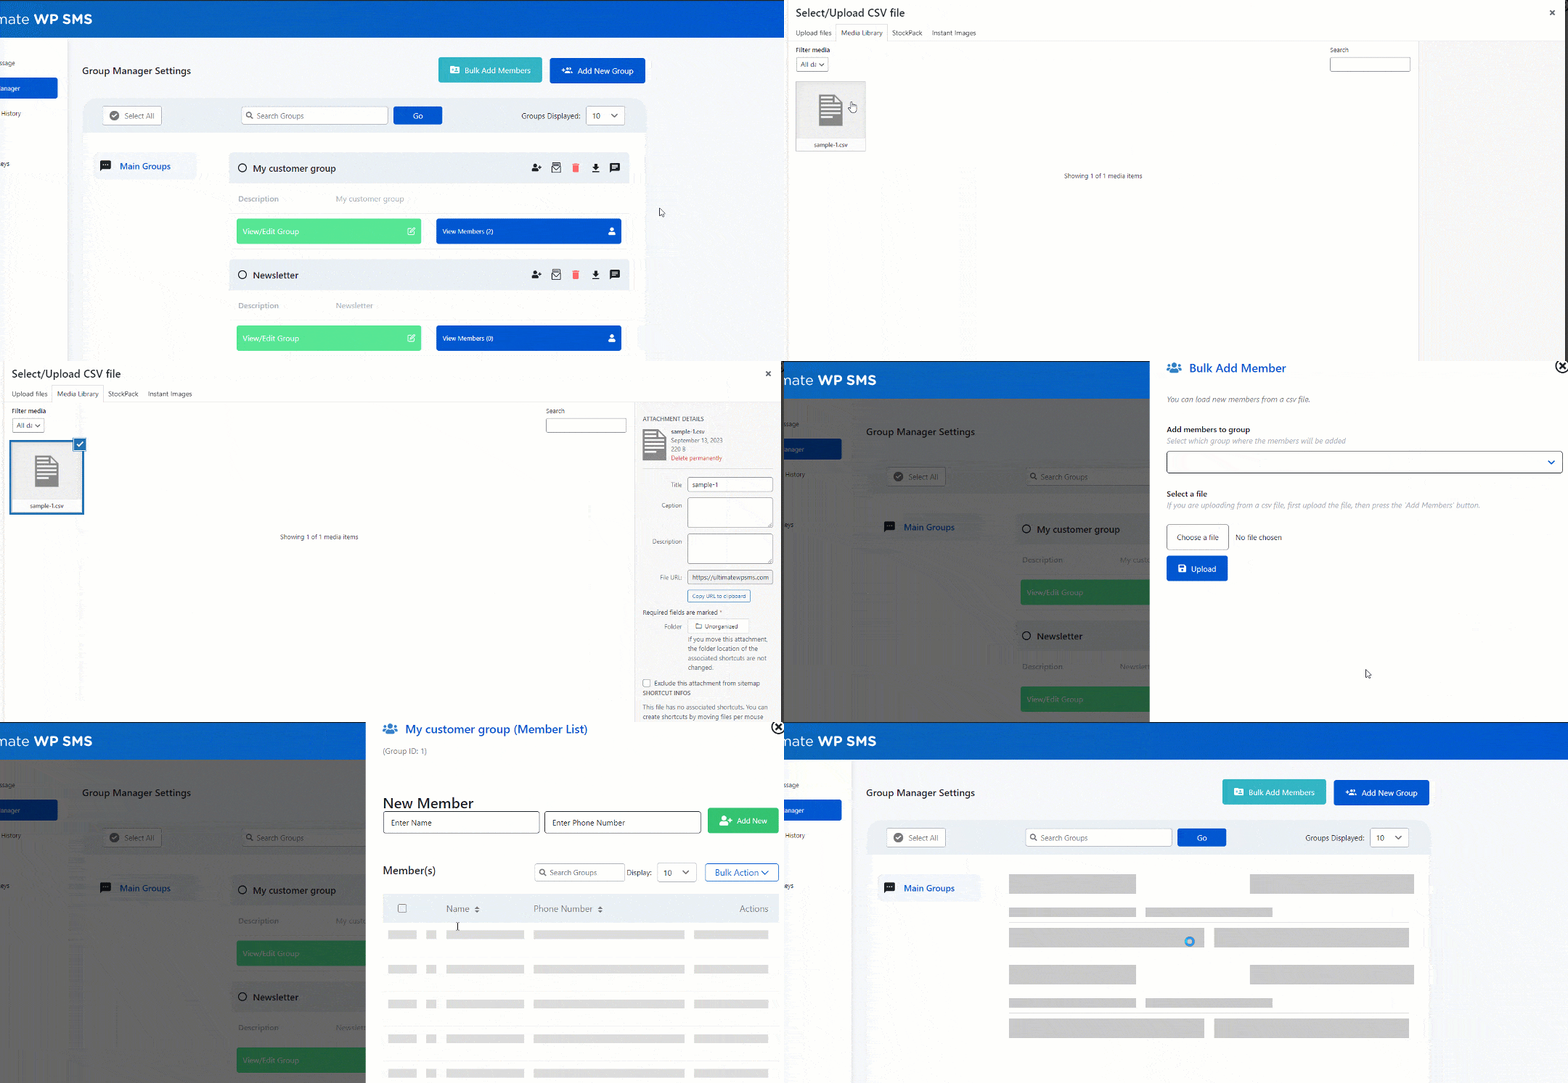
Click the ![]() button to open the sidebar menu for uploading members to a group. Select the desired group from the dropdown where to add the bulk members, then choose the .csv file extension where your members details is save, you will need to upload first your .csv file to you media library before you can select it, after choosing the file, press
button to open the sidebar menu for uploading members to a group. Select the desired group from the dropdown where to add the bulk members, then choose the .csv file extension where your members details is save, you will need to upload first your .csv file to you media library before you can select it, after choosing the file, press ![]() button to add to the group member, the new members will be automatically populated on the group member list. Here is a sample .CSV file. Any duplicate phone numbers will be rejected.
button to add to the group member, the new members will be automatically populated on the group member list. Here is a sample .CSV file. Any duplicate phone numbers will be rejected.
Delete Group Button
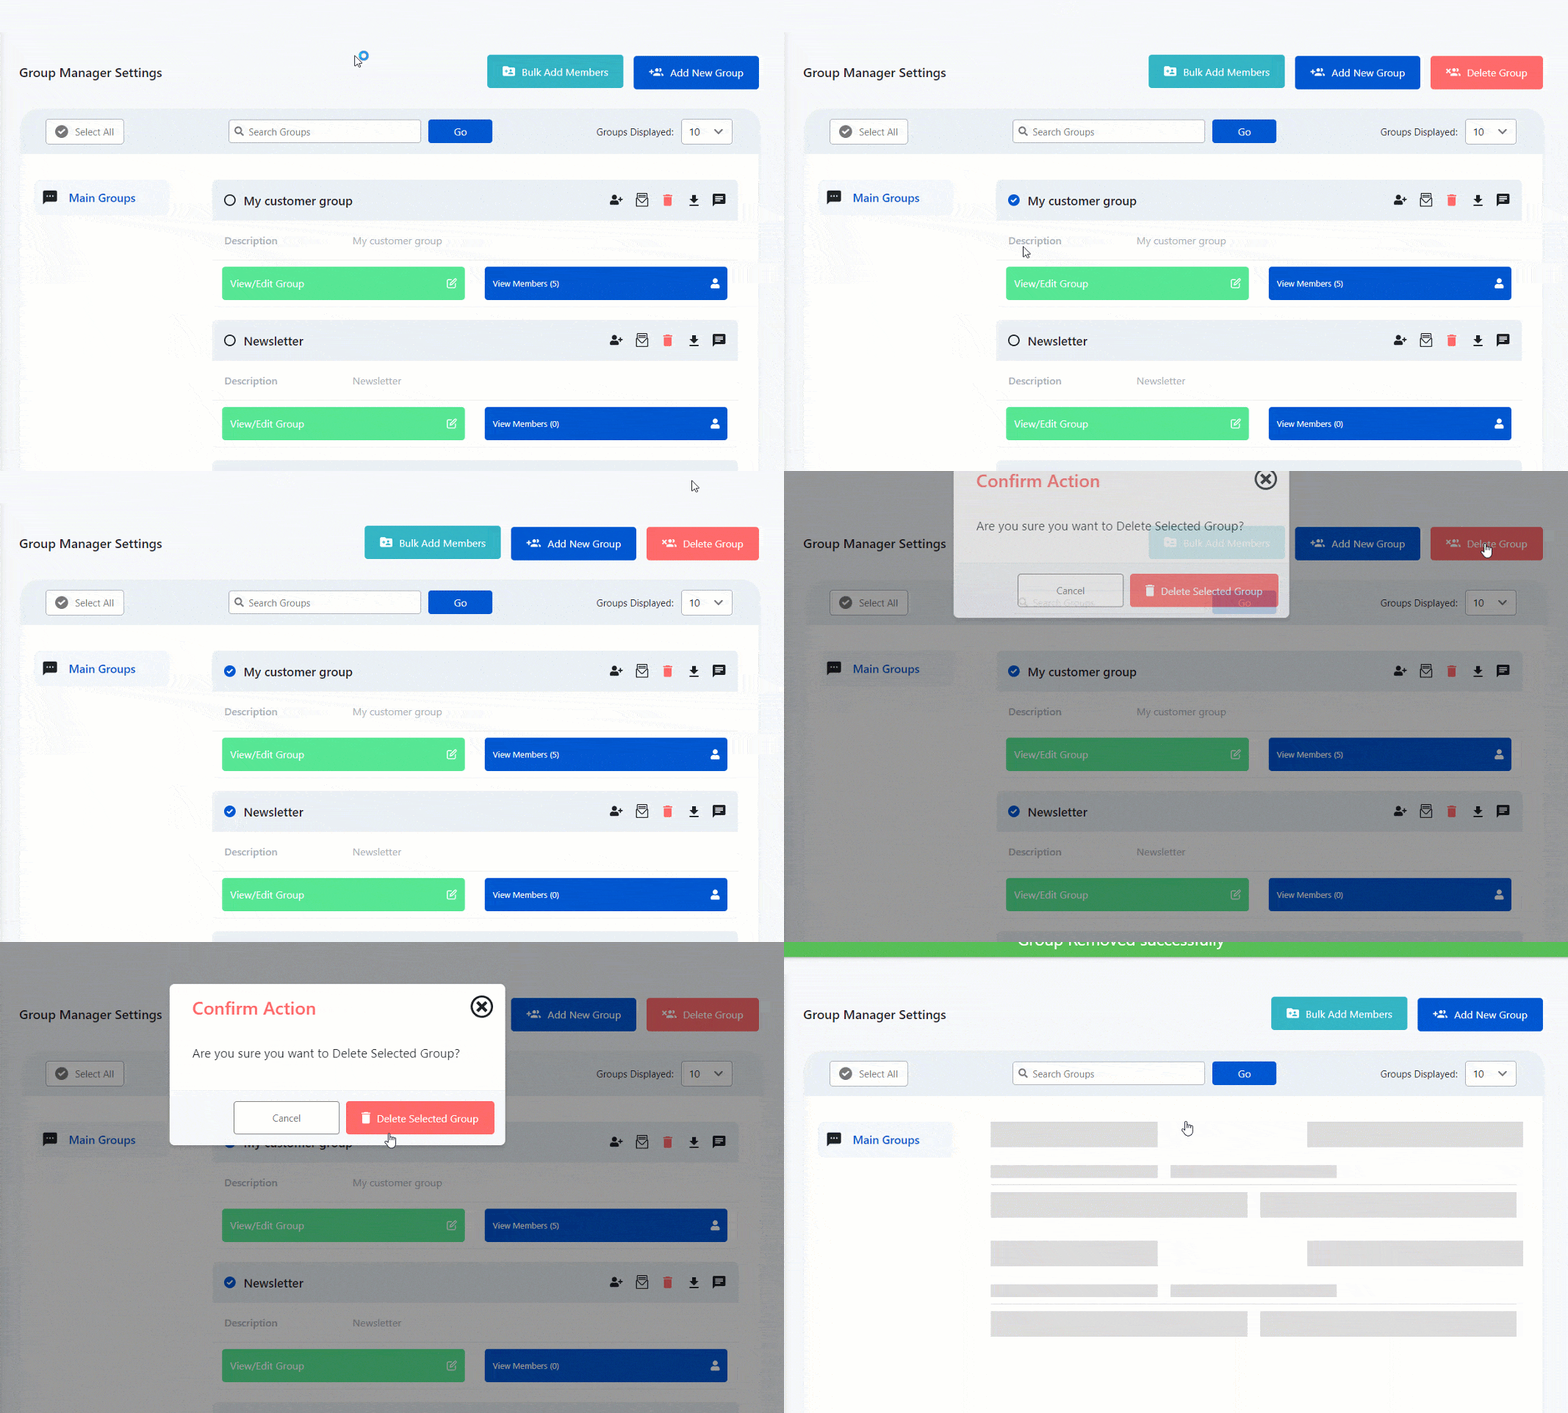
To delete single or multiple groups, select and simply check the checkbox of the groups you want to delete then click the ![]() button. A confirmation will pop out, then proceed if you want to delete the group(s).
button. A confirmation will pop out, then proceed if you want to delete the group(s).
View/Edit Group Button
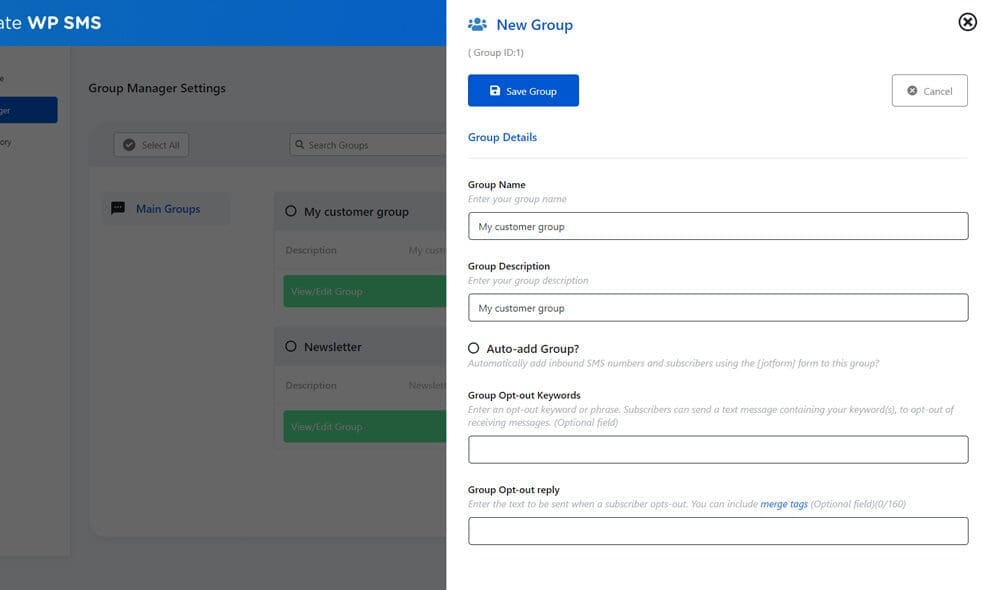
Clicking the “View/Edit Group” button, will display the group details sidebar. This will show Group Name, Group Description and other information and settings of this specific group that you can edit.
Group Details
This tab allows the existing group name and description to be updated.
You can select whether this is an “Auto-add” group. Subscribers who send you an SMS will be automatically added to “auto-add” groups.
You can also specify an “Opt out” keyword. Subscribers can send an SMS to you Twilio number including this keyword to opt-out from receiving SMS messages.
The choice of keyword you select is important, as some words are reserved. For example, if you use STOP as the opt-out keyword and a customer opts-out by sending STOP to your Twilio number, then no messages can be sent to that customer.
If you choose a word other than STOP, STOPALL, UNSUBSCRIBE, CANCEL, END, and QUIT, for example LEAVE, then UWS will just remove the customer from all groups where LEAVE has been configured as the opt-out keyword, but the customer will remain in any other groups, where LEAVE is not the opt-out keyword. Meaning that customers can choose to opt-out of some groups and remain in others and receive messages pertinent to those groups.
Subscribers can text the following opt-out options:
{the group keyword}– to be removed from all groups using this keyword.all= to be removed from all groups.- When a subscriber has decided to opt-out, an SMS message is sent to them confirming they’ve been removed from the group or groups. The contents of the SMS is specified in the “Group Opt-out reply” field.
To use the opt-out functionality, you must configure Twilio’s “A Message Comes In” field. This should be automatically configured on the plugin’s Messaging-Settings-Twilio settings page.
Alternatively you can manually configure your numbers a Messaging Service from your Twilio account.
View Members Button
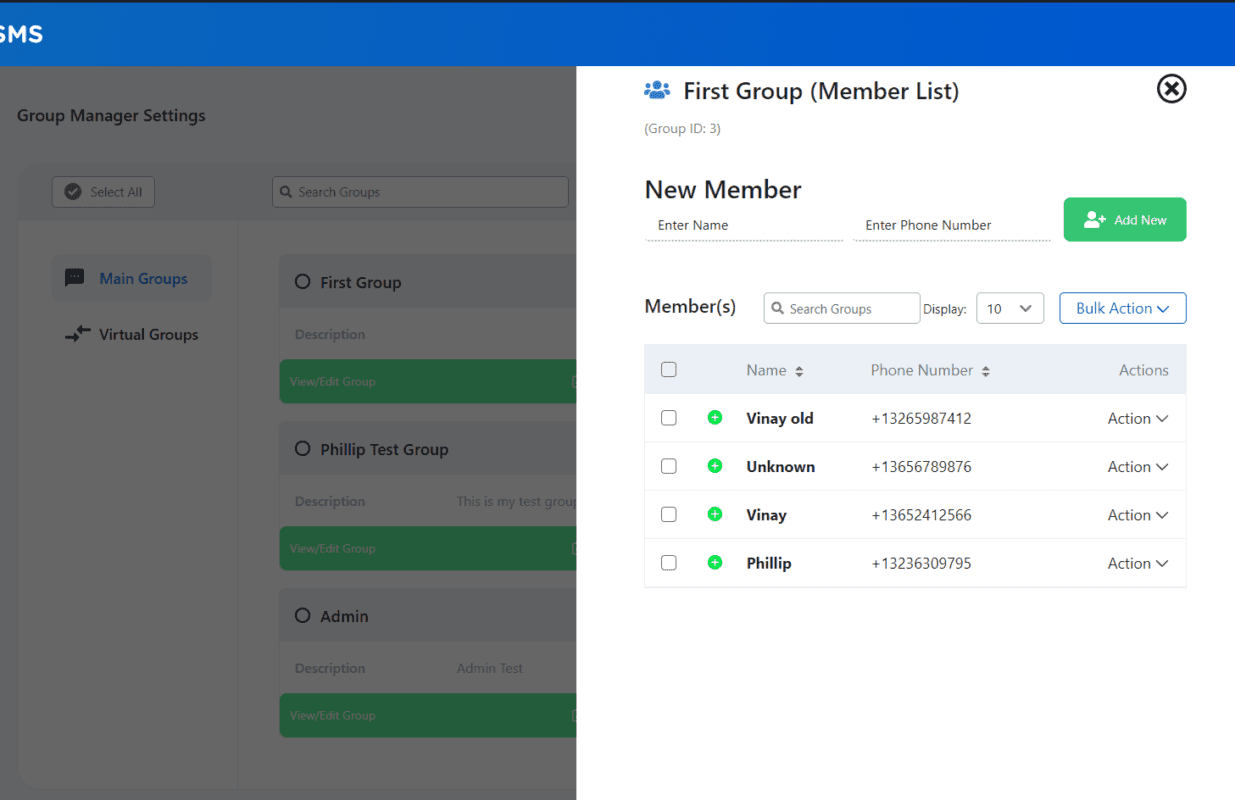
Clicking the “View Members” button, will display the list of members on that specific group. 
This will show the member names, mobile phone numbers and other details, this is where you can add new member, this will also show actions for updating member details, copying, moving, removing and banning the member individually or by bulk action.
Member List
This Member List Sidebar allows:
- New members to be added to the selected group.
- For updating members detail.
- For the copying, moving and deletion of existing group members.
Add New Member
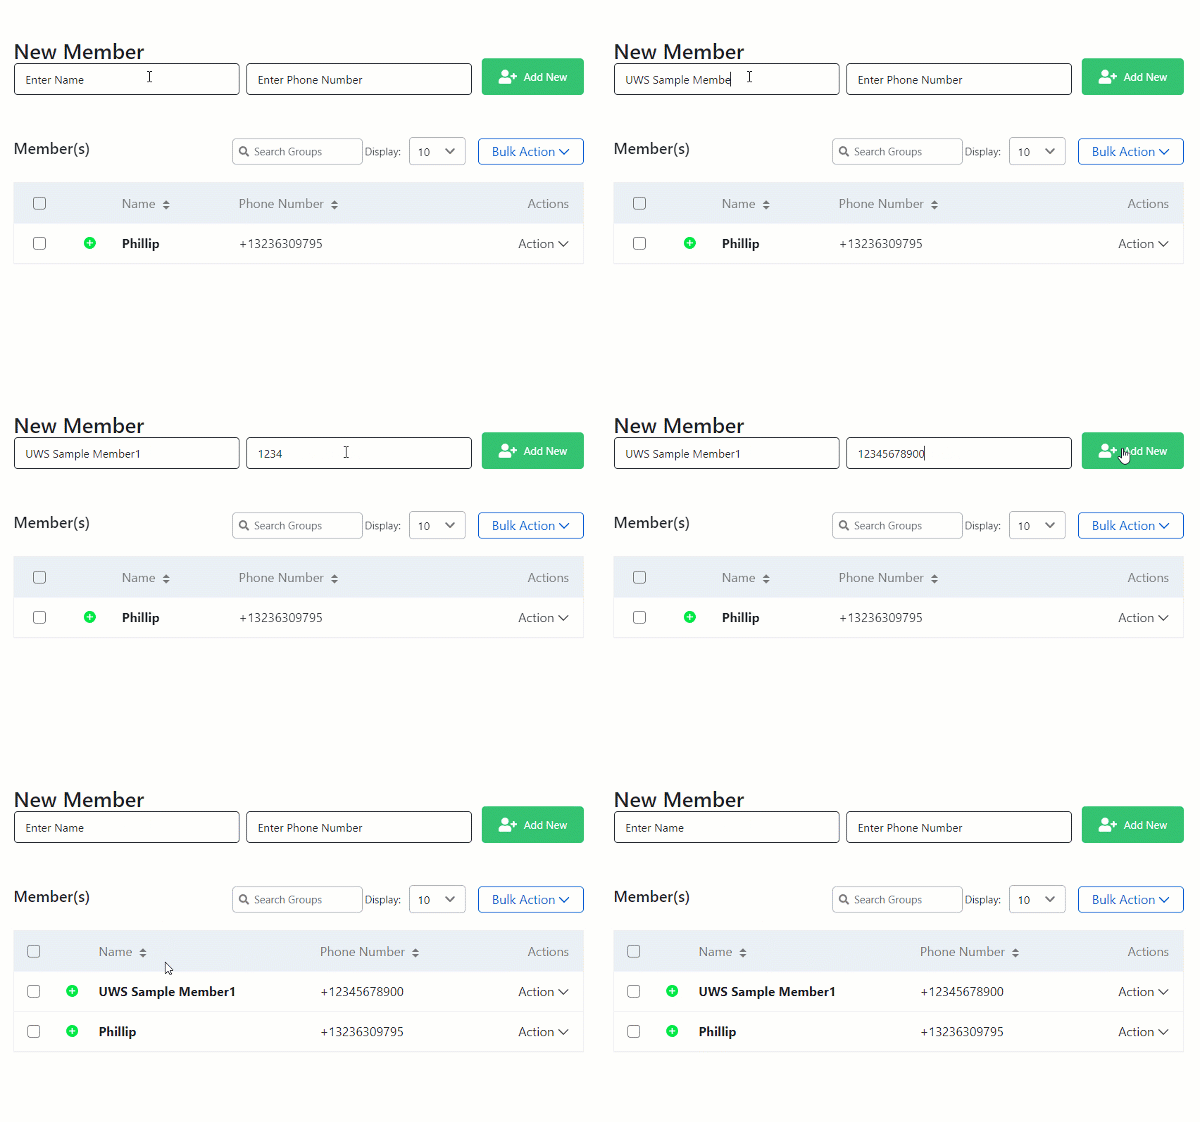
To add a new member, enter their name and mobile number then press the ![]() button.
button.
Edit Member
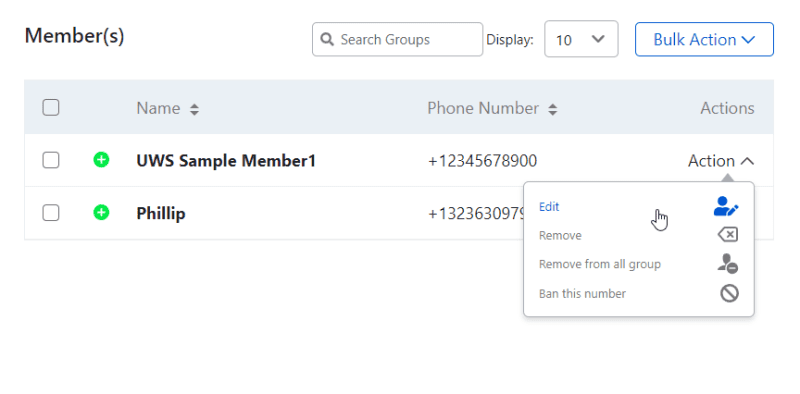
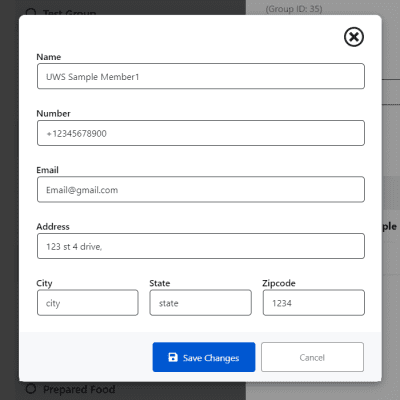
To update an existing member, press the “Action” dropdown menu at the right side of the member and press “Edit“. A pop up menu will show for updating details. You can also add other information to the member like email, city, state and zip code for reference. Input the details on the textbox and click the ![]() button to save changes.
button to save changes.
Delete Member
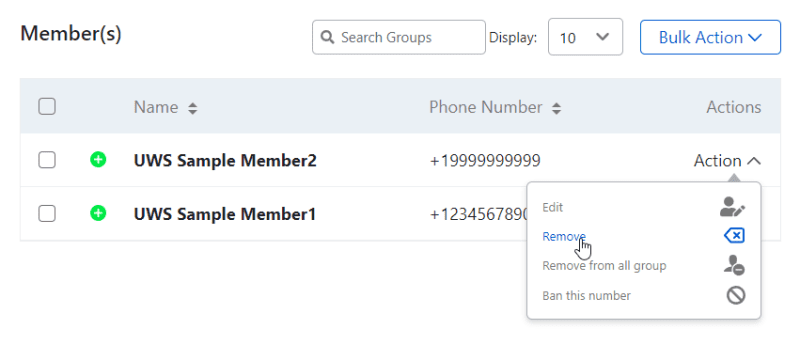
To delete an existing member, press the “Action” dropdown menu at the right side of the member and press “Remove” or “Remove from all group” to remove the member with the same phone number from all groups. A confirmation will pop out, then proceed if you want to continue deleting the member.
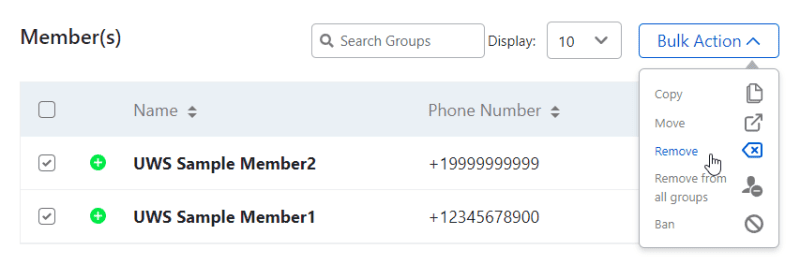
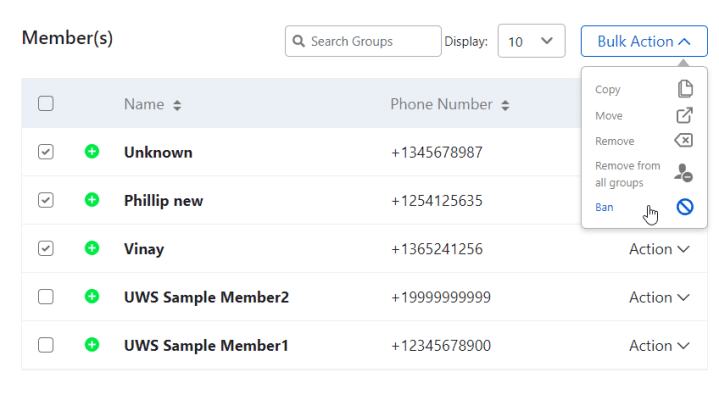
You can also delete multiple members at once. Simply select and click the checkbox that corresponds to the name of the members you want to delete, then press the ![]() to open the dropdown menu and select “Remove” or “Remove from all group“. A confirmation will pop out, then proceed if you want to continue deleting the members.
to open the dropdown menu and select “Remove” or “Remove from all group“. A confirmation will pop out, then proceed if you want to continue deleting the members.
Ban a Member
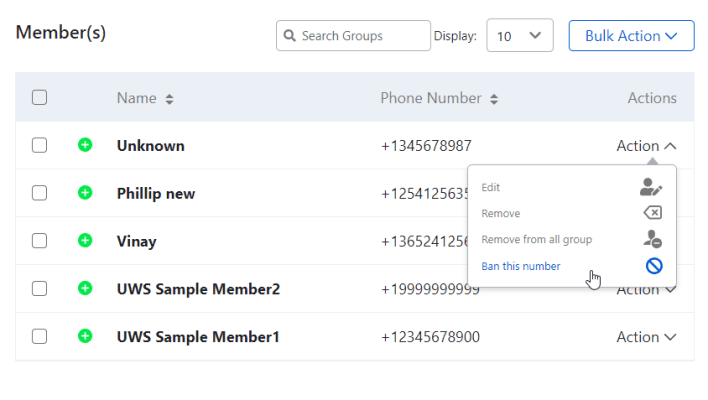
To ban an existing member, press the “Action” dropdown menu at the right side of the member and press “Ban this number“. This will make the selected member with the phone number unable to receive incoming messages and also blocks it from sending message to your number. A confirmation will pop out, then proceed if you want to continue to ban the member.

![]()
![]()
![]()
![]()
![]()

Phone numbers placed in this field will not be allowed to subscribe to groups. Numbers in this list will be blocked from subscribing if the are trying subscribe by SMS, using the UWSFORM shortcode or using a Gravity Form. Numbers should be added to the banned number list one number per line.
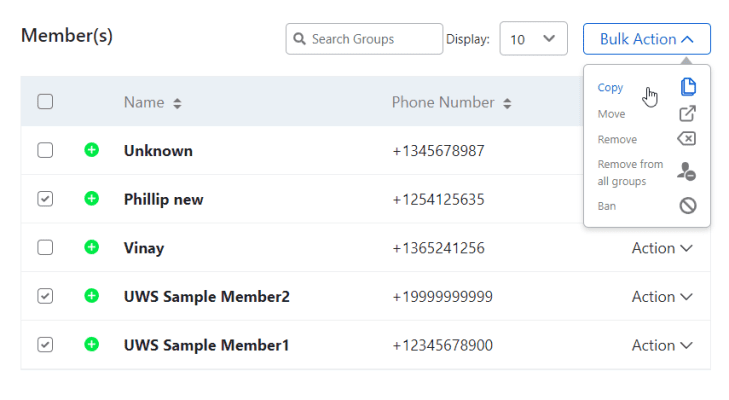
Copy member(s) to other group
To copy a single or multiple members to other group, press the ![]()
![]()
![]()
![]()
![]()
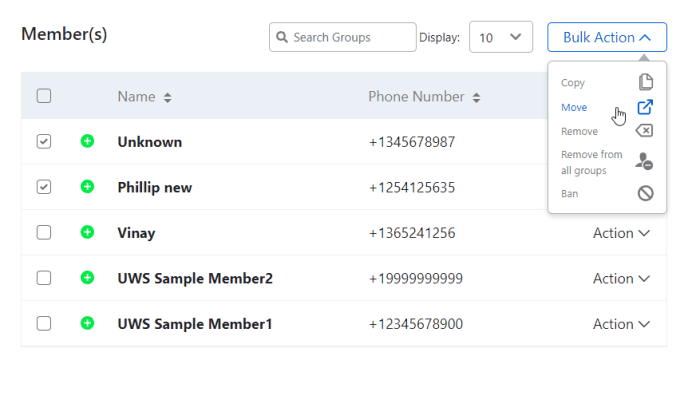
Move member(s) to other group
To move a single or multiple members to other group, press the ![]()
![]()
![]()
![]()
![]()
Group Invite Settings
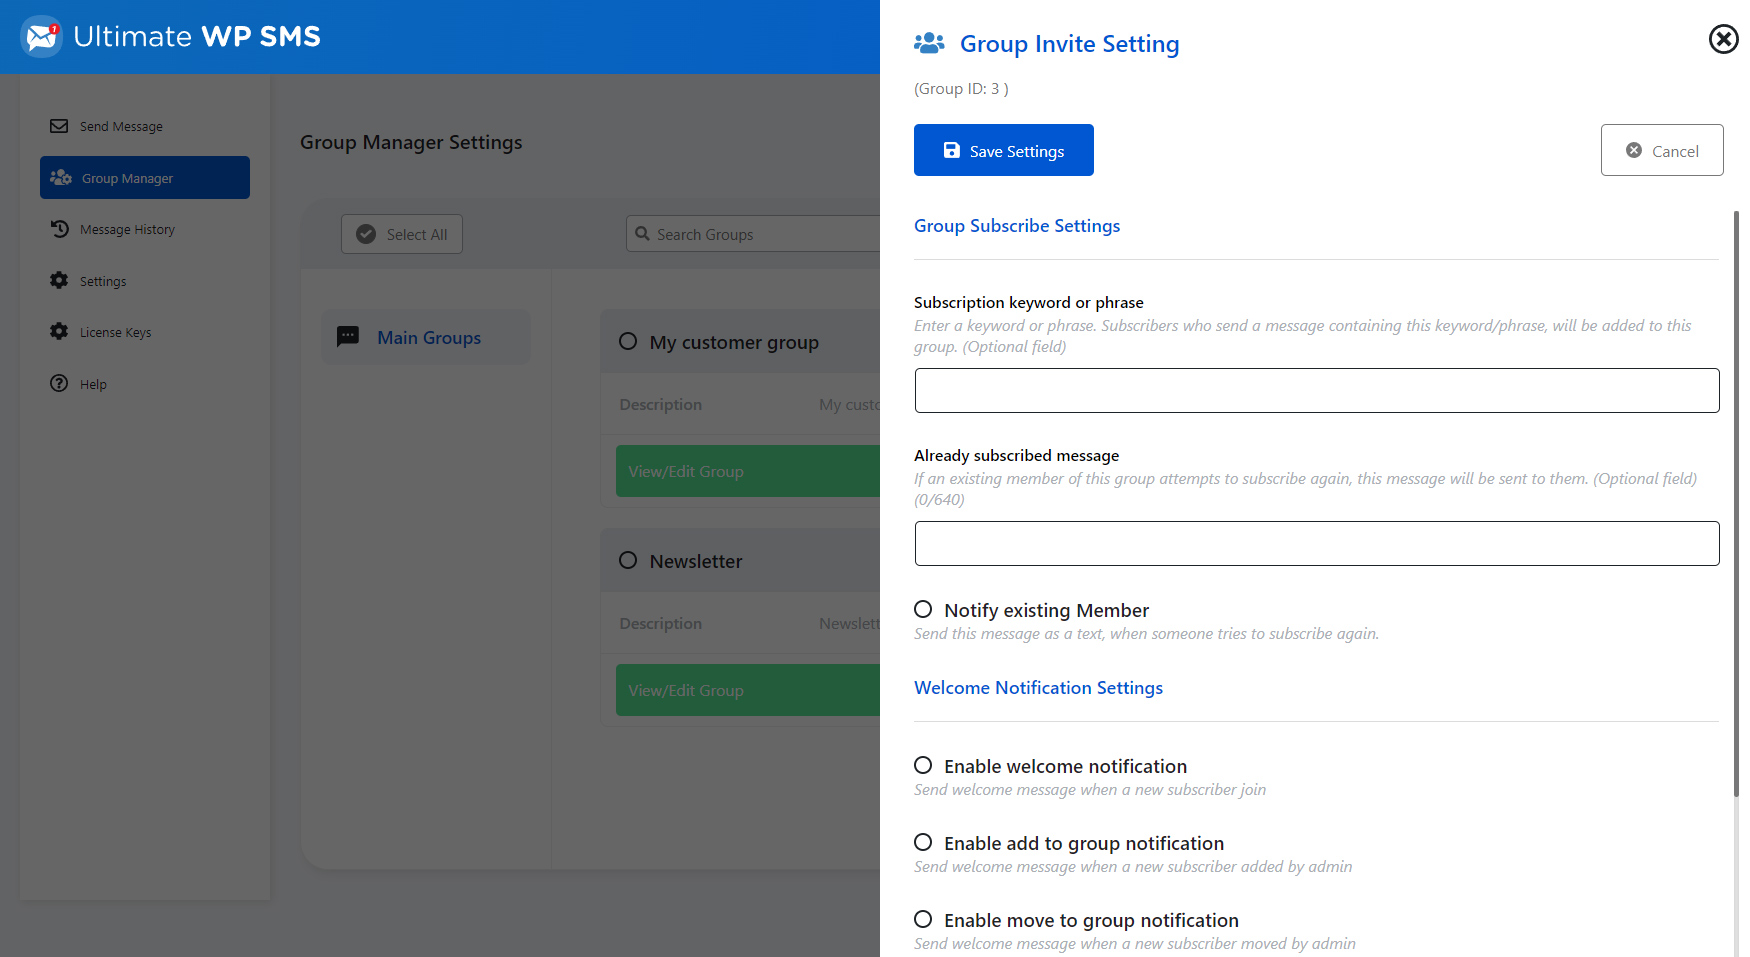
From the “Group Invite” sidebar you can construct a form which you can place on your website, to invite your website visitors to subscribe to SMS/voice message updates.
You can also specify a subscription keyword, used to subscribe new members using inbound text message, rather than using the web form.
You can choose whether to send the subscribes an SMS message containing a welcome message.
The HTML for your form is provided on this tab or you can choose to use the shortcode [uwsform].
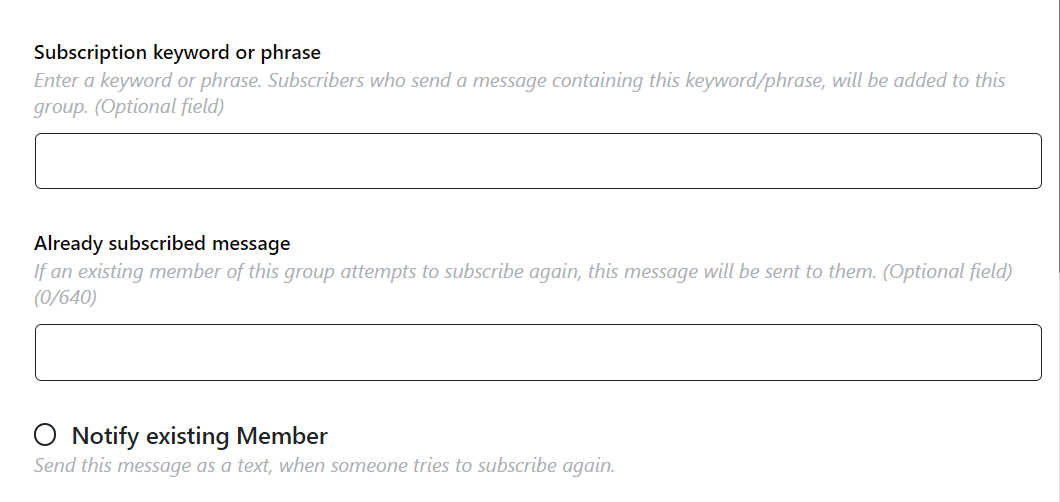
Group Subscribe Settings
You can also use this tab to specify a subscription keyword. When a text message is received containing this keyword, by your Twilio number, the sending number is added into this uws group.
You must have configured Twilio to route inbound messages to the plugin. To do this configure the “Number URL” and “Messaging Service URL” associated with your number in your Twilio account. See the Settings tab documentation for details.
Welcome Notification Settings
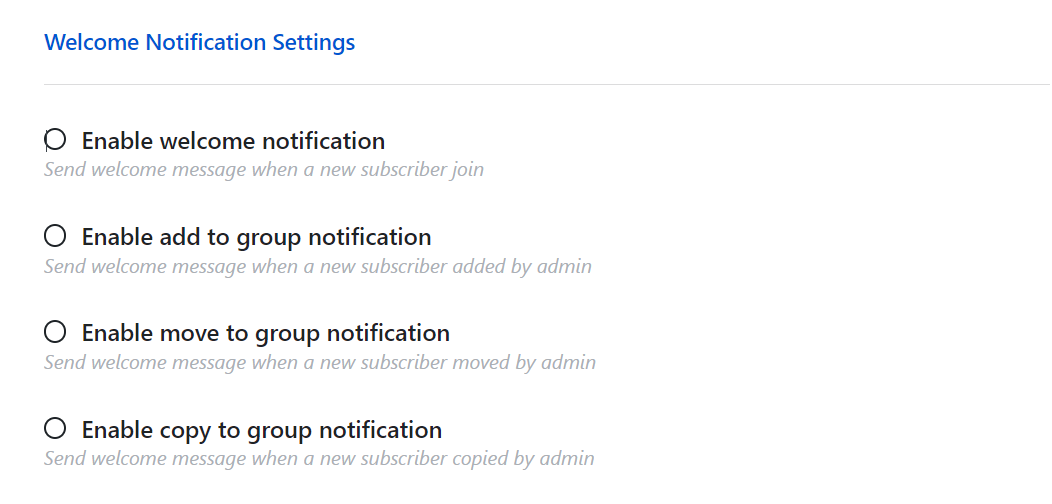
Enable notification messages whether a new subscriber joins the group, added, moved or copied.
Select phone number for ‘Welcome Message’. If you have multiple Twilio numbers, you can optionally chose which number the ‘welcome messages’ will be sent from. If you don’t select a number here, then the default number selected in the Settings-Twilio Settings tab will be used.
If you have enabled “Messaging Services“, then the numbers in your number pool will take precedence over the “group number” set here.
Enable welcome message. Check this box if you want to send an SMS message to new subscribers (i.e. people who have entered their name and number into your form to subscribe to your group).
Enter welcome message. If you’ve clicked the option above, then enter your welcome message here. You can use the special tags shown below in your welcome message:
- %fullname% or %name% – when the message is sent, this tag is replaced by the message recipients full name.
- %firstname% – this tag is replaced by the recipients first names (i.e. everything but their last name)
- %lastname% – this tag is replaced by the recipients last name.
- %number% – the tag is replaced by the recipients phone number.
- %optout% – If you’ve specified an opt-out keyword for this group, this tag is replaced with the keyword.
- %uws_groupid% – the id number of the group a member has subscribed to.
- %uws_groupname% – the name of the group a member has subscribed to.
- %uws_groupdesc% – the name description of the group a member has subscribed to.
Send Welcome Message When. You can choose to send a welcome message when an administrator:
- Manually adds a new member to this group, from the Member List tab or through the Bulk Add screen.
- Manually moves a member into this group from the Member List tab.
- Copies a member into this group from the Member List tab.
If you want to capture additional information from your subscribers or give your subscribers the ability to join more than one group, then please take a look at the the documentation and the and at the FAQ or Contact Us.

