Message Scheduler Extension (Schedule Manager) – PRO
The “Schedule Manager” tab
A new tab, the “Schedule Manager”, allows you to see the status of your schedule and the status of completed scheduled jobs.
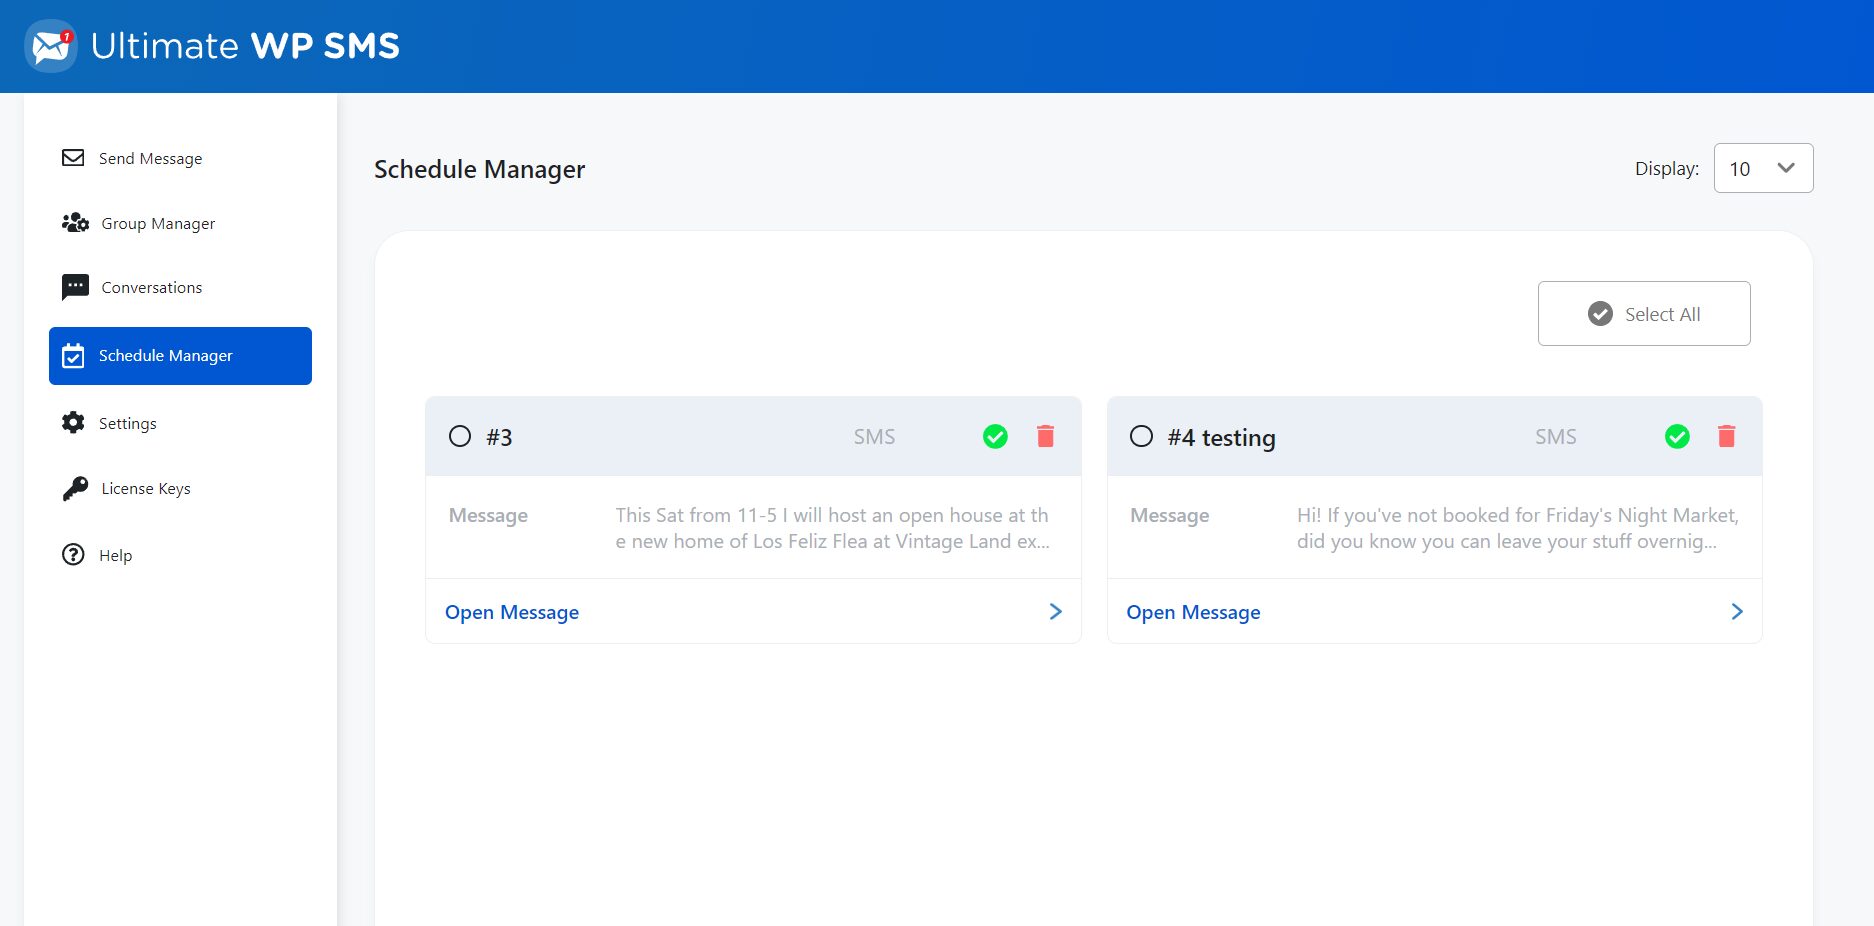
Schedule Manager Tab
Clicking on an existing schedule, will open up the message schedule details, allowing you also to edit the content of the message and the schedule time and date if the scheduled message has not been queued for sending.

Schedule Plans
The Message Scheduler Extension, now allows “Schedule Plans” to be created.
A schedule plan allows you to send out a series of messages to group members, based on the date when they joined the group. The joining date could be the day when they first subscribed, or the date when you, as the site administrator, manually added them to the group.
You can add as many items to a plan as you wish and you have the option to send out messages days. weeks, months or even years after the subscription date.
SMS, MMS, audio file or text-to-voice message types can all be added to the schedule plan.
The image below shows an example of a schedule plan for a group called “Schedule Planner Test Group”. The plan consists of 4 items; messages will be sent out to members, 1 day after they joined the group, 2 days after they joined etc.
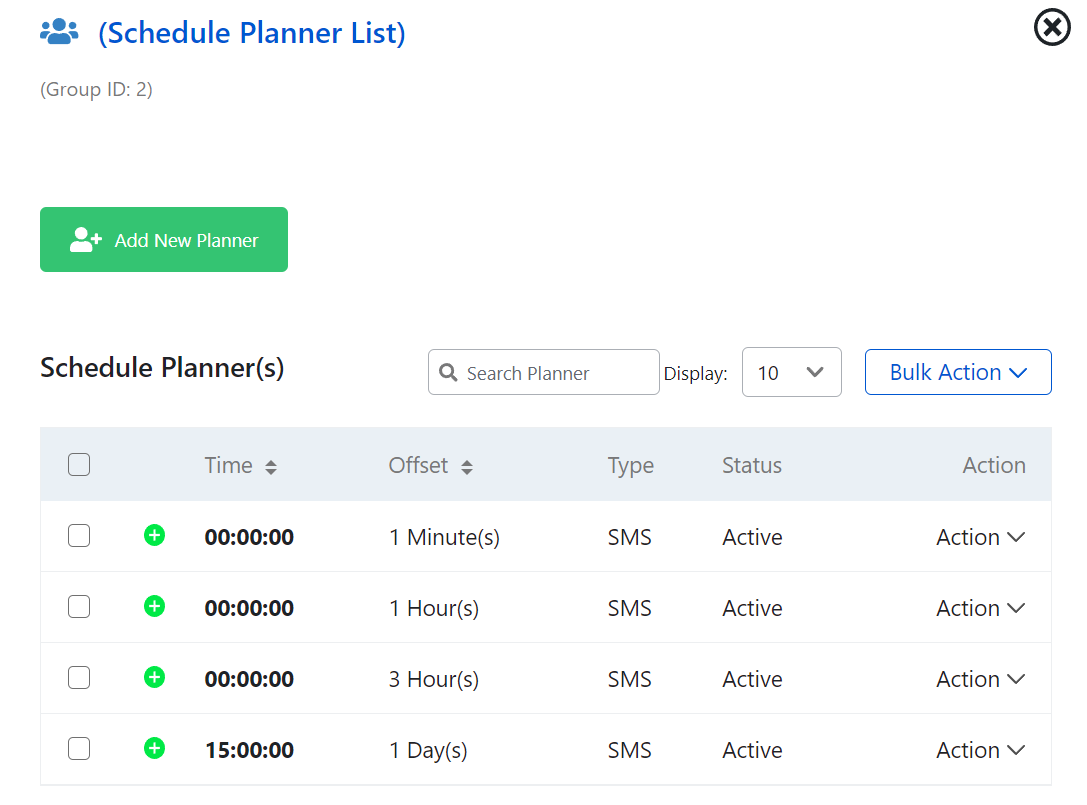 Schedule Plan showing 4 plan items
When you add a plan item, you can configure the following:
- When you’d like the message to be sent, i.e. the duration after the group member’s subscription date.
- The time of day when you’d like the message to be sent
- Whether this plan item is currently active or not
- The content of your message, which can include merge tags such as %firstname%, %number%
- An optional message suffix, which may be your site or company name.
- The message type (SMS, MMS, audio/text-to-voice).
- And a Sender ID, which replaces your Twilio number with an an alphanumeric string, such as your company name, when people receive your message. (Alphanumeric sender ids are not supported in the USA).
To avoid timeouts occurring when processing large batches of scheduled messages, the messages are sent out in batches of 150 at a time. If more than 150 messages have been scheduled, the plugin will process all them in several batches. For example, 450 scheduled messages would be processed in 3 batches each of 150 messages. Assuming that a regular cron job has been created, there would be a 10 minute interval between each batch. The size of the processing batch can be adjusted in the Ultimate WP SMS Pro settings.
To purchase the add-on, kindly visit the UWS Message Scheduler Extension page.
Step 1 – disable the default WordPress cron
To disable the default WordPress cron, edit the wp-config.php file adding the following line, placed where all of the other DEFINE statements are located:
define('DISABLE_WP_CRON', true);
Step 2 – add a new cron job
The scheduler extension needs to be called at regular intervals to check whether there are any scheduled messages to send. To call the plugin script, a command needs to be called every few minutes from an external scheduler, such as cron (on Linux) or Task Manager (from Windows). If your WordPress hosting company uses cpanel, then follow the steps described here to configure a cron job. It is recommended that the cron job runs every 5 minutes.
If you do have access to cron, then create a job to run the following command:
wget -q -O - http://yourwebsite.com/wp-cron.php?doing_wp_cron >/dev/null 2>&1
If you do not have access to cpanel or a similar scheduler, then you can call the UWS Message Scheduler from Pingdom’s free monitoring service. Configure the free Pingdom monitor to call http://www.yourwebsite.com/wp-cron.php
The free Pingdom service will call the UWS Message Scheduler a minimum of every 15 minutes, meaning that some messages you’ve scheduled may be sent up to 15 minutes later than scheduled. If you need more accurate scheduling then consider Pingdom’s paid-for services.
Assistance can be provided with these configuration steps by emailing help@ultimatewpsms.com
These changes are recommended but not mandated. The changes are recommended because WordPress checks whether any jobs are scheduled when someone visits your site, not at regular time intervals. For example, you may have scheduled some messages to be sent a 2am. Using the default WordPress scheduler, if someone visits your website at around 2am, then WordPress will run the schedule. If nobody visits your site until 8am, then the messages will not be sent until 8am. If you have the time and inclination this article explains this in more detail.